We recommended to use CURA on Mac OS X.
You could get a copy of the CURA Software from [HERE].
https://ultimaker.com/en/products/cura-software
After Installation, Open the CURA in Application, you would see the setting Screen.
Please do the following: (Please click the images for larger images)
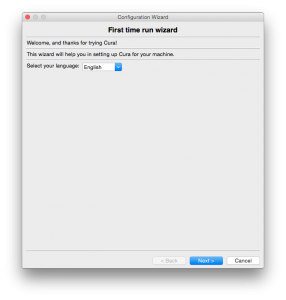 Select You Language
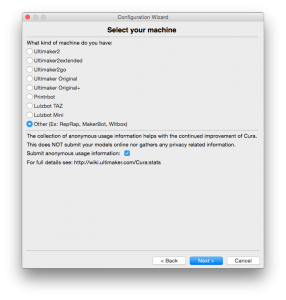 Choose Others for your TinyBoy
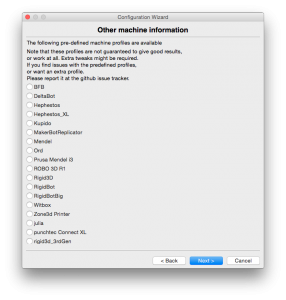 Do Nothing
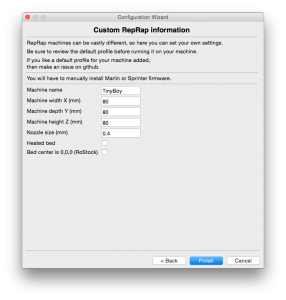 Setup the Travel Distance and the Nozzle Size
Once Finished, you are now at the CURA Main Window.
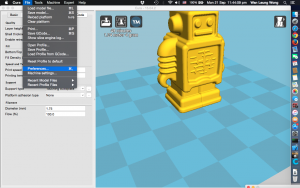
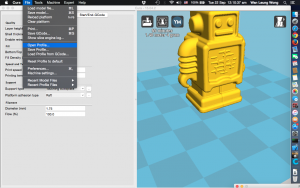
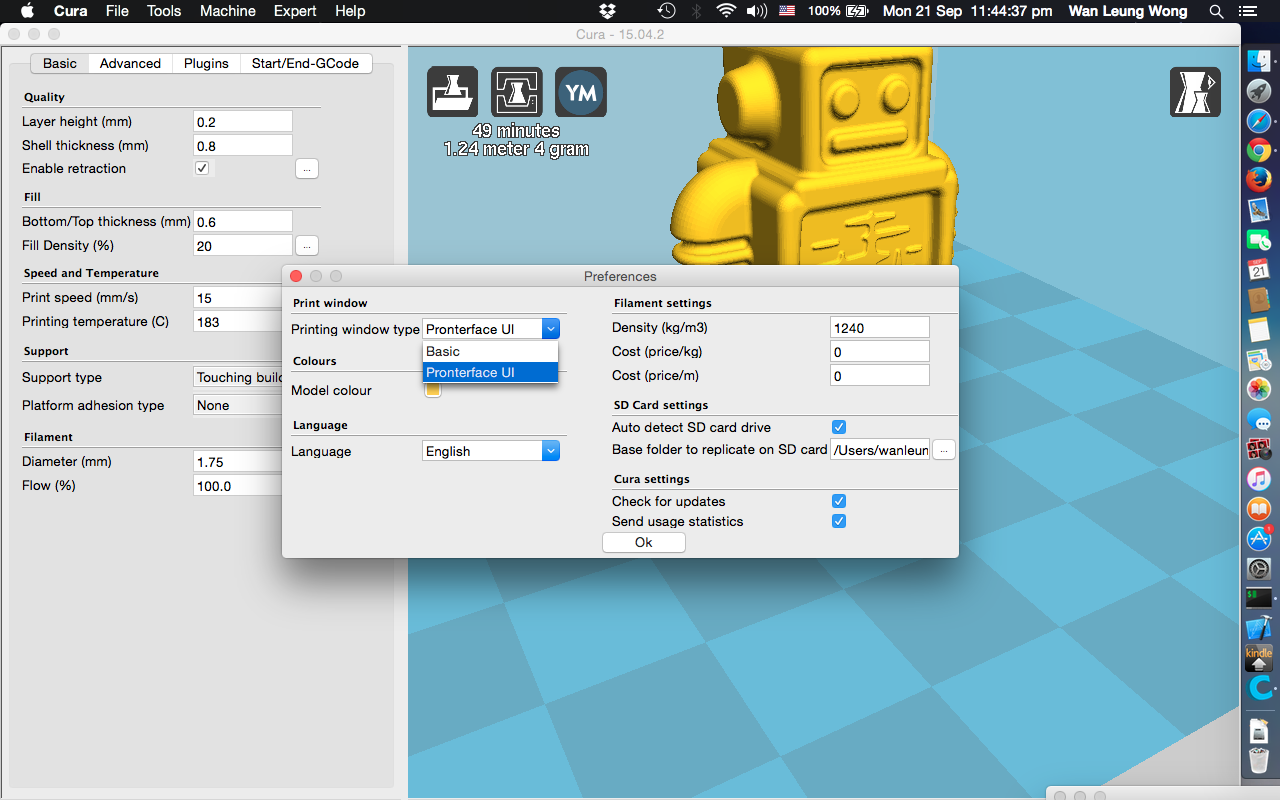
Choose Preference
Setup the Travel Distance and the Nozzle Size
Once Finished, you are now at the CURA Main Window.
Choose Preference
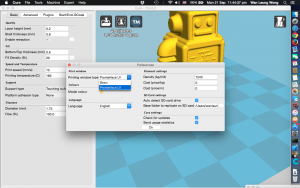
 At Print Window Type, Choose Pronterface UI.
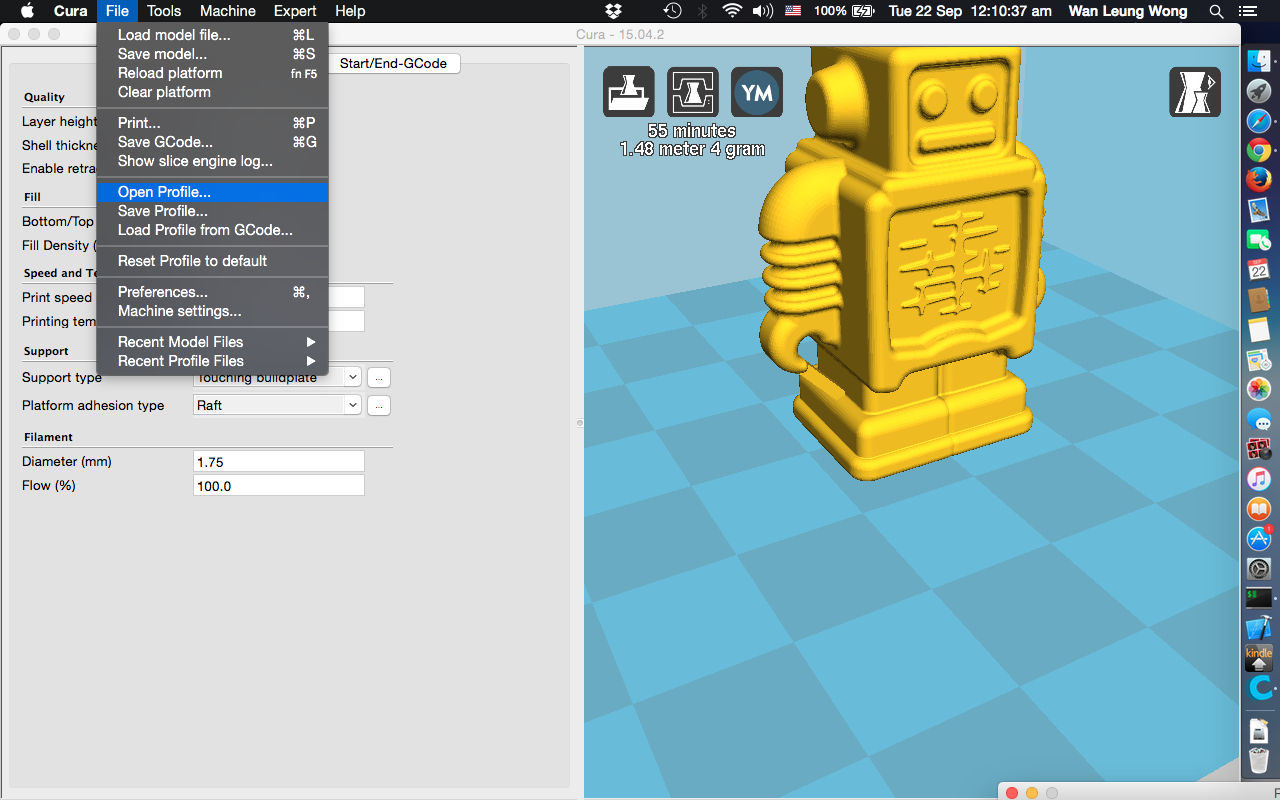
 Please download this CURA Profile:
https://raw.githubusercontent.com/HKCOTA/TinyBoy-Settings/master/CURA/TinyBoy.ini
Then Load the Profile into CURA
Please download this CURA Profile:
https://raw.githubusercontent.com/HKCOTA/TinyBoy-Settings/master/CURA/TinyBoy.ini
Then Load the Profile into CURA
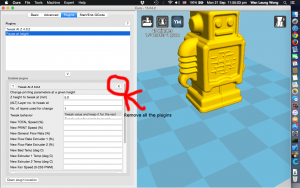
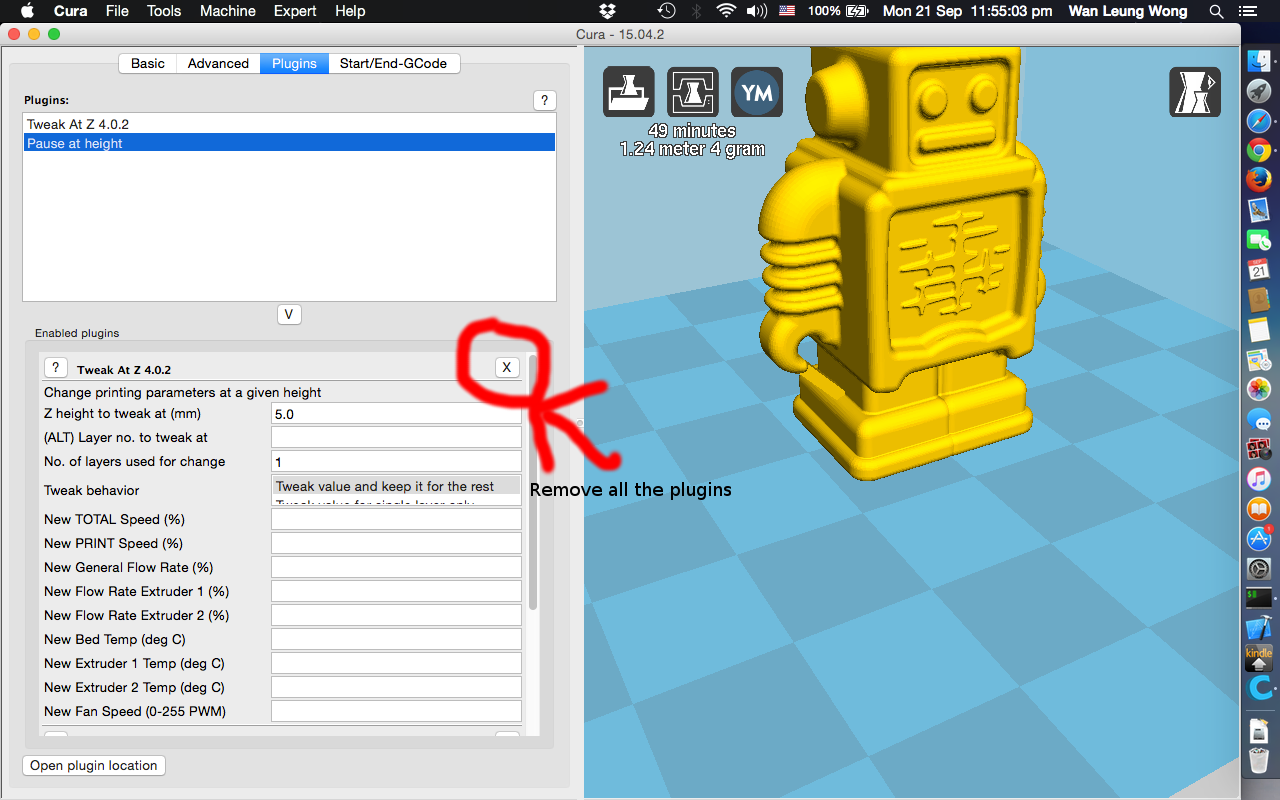
 Go to the pluglins Tab and remove all the plugins when the box at the below is empty.
 Now you can try to load your 3D models (in stl file) into CURA, and prepare your TinyBoy to print.
Once you are ready (such as fill in you filament).
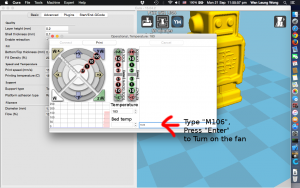
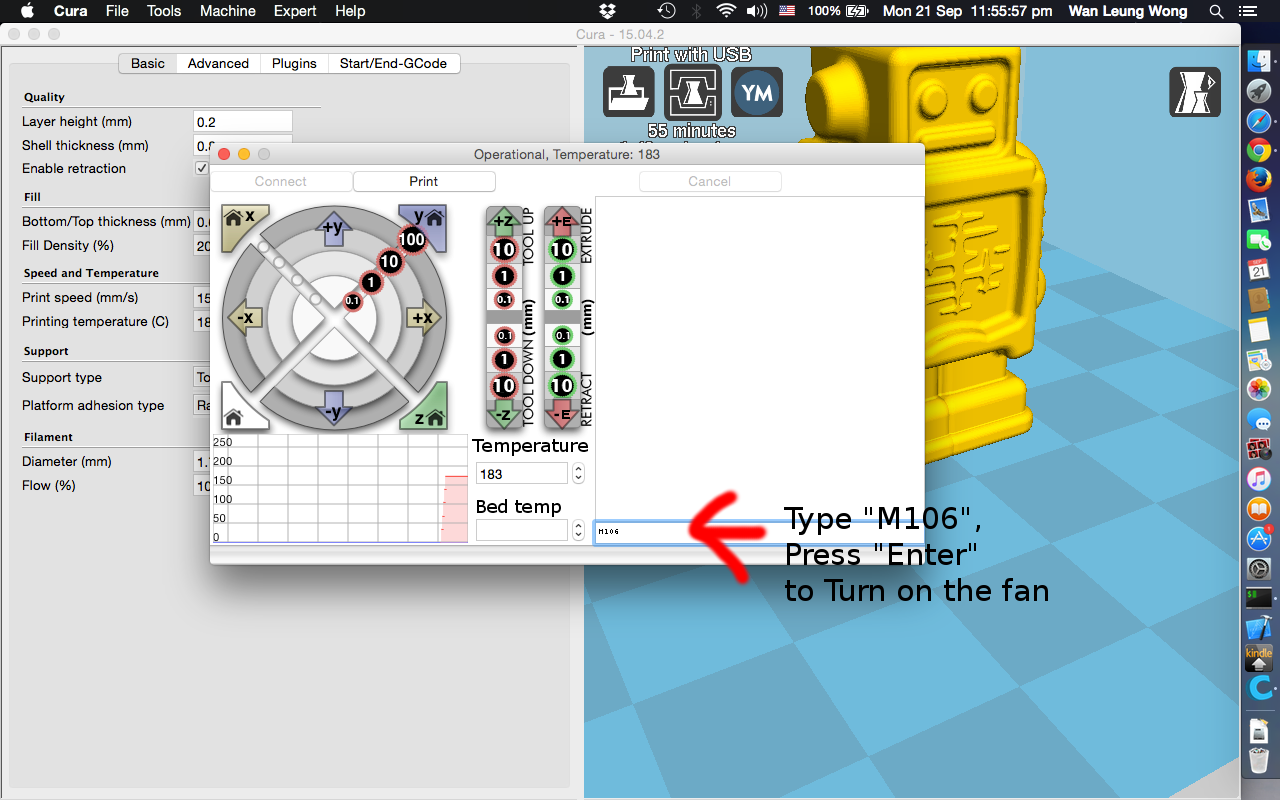
Please click print, you will see this dialog jump out. This is the print control. Please Enter "M106" in the bottom right box as the picture below to turn on the fan.
Now you can try to load your 3D models (in stl file) into CURA, and prepare your TinyBoy to print.
Once you are ready (such as fill in you filament).
Please click print, you will see this dialog jump out. This is the print control. Please Enter "M106" in the bottom right box as the picture below to turn on the fan.
 Then click the "Print" Button, and have fun.
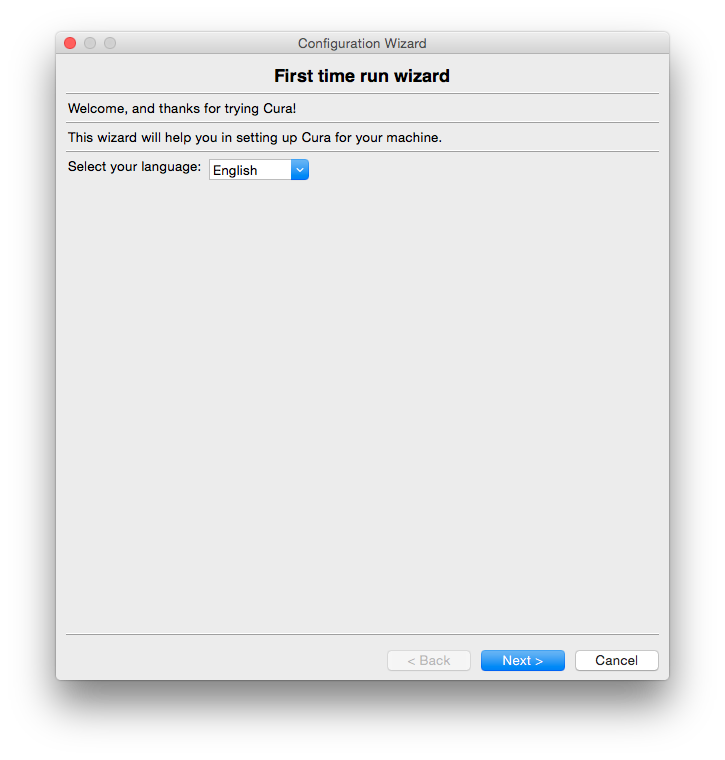 Select You Language
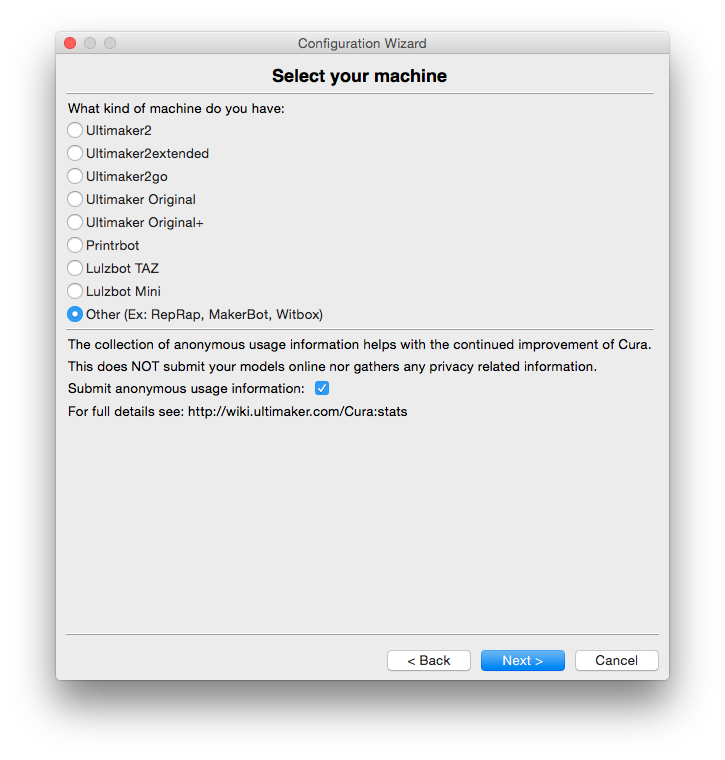 Choose Others for your TinyBoy
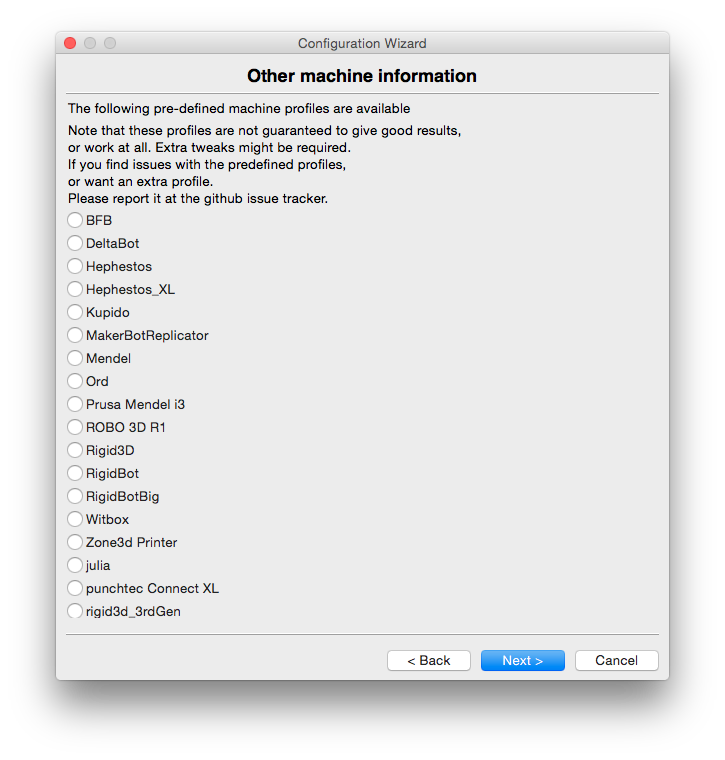 Do Nothing
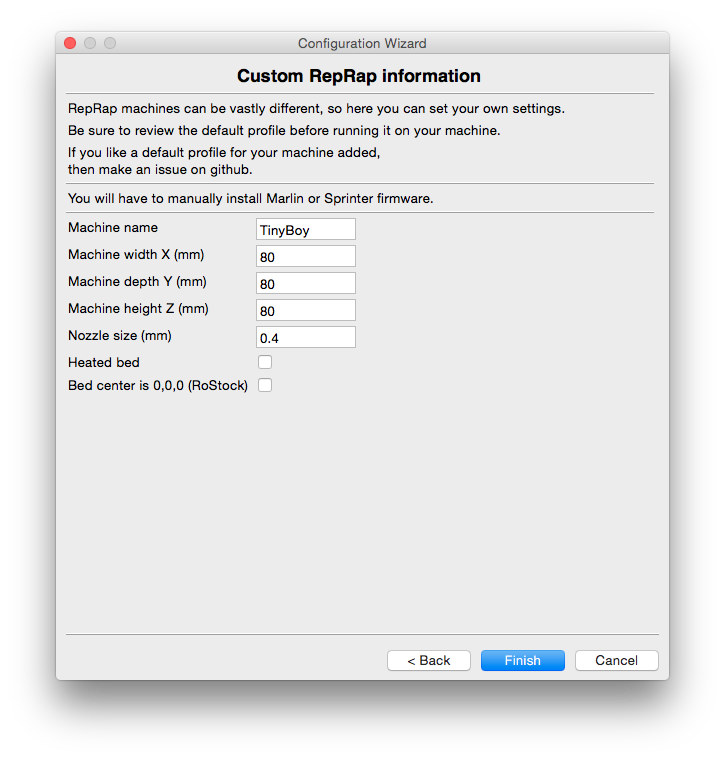 Setup the Travel Distance and the Nozzle Size
Once Finished, you are now at the CURA Main Window.
Choose Preference
Setup the Travel Distance and the Nozzle Size
Once Finished, you are now at the CURA Main Window.
Choose Preference
 At Print Window Type, Choose Pronterface UI.
 Please download this CURA Profile:
https://raw.githubusercontent.com/HKCOTA/TinyBoy-Settings/master/CURA/TinyBoy.ini
Then Load the Profile into CURA
Please download this CURA Profile:
https://raw.githubusercontent.com/HKCOTA/TinyBoy-Settings/master/CURA/TinyBoy.ini
Then Load the Profile into CURA
 Go to the pluglins Tab and remove all the plugins when the box at the below is empty.
 Now you can try to load your 3D models (in stl file) into CURA, and prepare your TinyBoy to print.
Once you are ready (such as fill in you filament).
Please click print, you will see this dialog jump out. This is the print control. Please Enter "M106" in the bottom right box as the picture below to turn on the fan.
Now you can try to load your 3D models (in stl file) into CURA, and prepare your TinyBoy to print.
Once you are ready (such as fill in you filament).
Please click print, you will see this dialog jump out. This is the print control. Please Enter "M106" in the bottom right box as the picture below to turn on the fan.
 Then click the "Print" Button, and have fun.